How To Safely Drain and Flush Your Water Heater
June 24, 2024
A water heater is an essential component of any household, providing hot water for daily activities such as bathing, cooking, and cleaning. However, like any other appliance, it requires regular maintenance to function efficiently and extend its lifespan. One crucial aspect of water heater maintenance is draining and flushing the unit. This process helps remove sediment buildup, which can cause the heater to operate less efficiently and even lead to premature failure. In this comprehensive guide, we will walk you through the step-by-step process of safely draining and flushing your water heater.

Understanding the Importance of Draining and Flushing Your Water Heater
Regular maintenance of your water heater is vital for ensuring its optimal performance. Over time, minerals like calcium and magnesium, commonly found in water, can settle at the bottom of the tank. This sediment buildup can lead to various issues, such as reduced heating efficiency, increased energy consumption, and potential damage to the tank. By draining and flushing your water heater, you can prevent these problems and ensure a steady supply of hot water.
In regions like South Florida, where water heaters are subject to high usage due to the warm climate, regular maintenance becomes even more critical. The local water quality, which can be high in minerals, further necessitates periodic flushing to avoid excessive sediment accumulation. Whether you have a new water heater installation or an older unit, this maintenance task is essential for prolonging its lifespan and ensuring reliable performance.
Gathering Necessary Tools and Safety Precautions
Before starting the draining and flushing process, it’s essential to gather the necessary tools and take safety precautions. You will need a garden hose, a bucket, a flathead screwdriver, and possibly a wet/dry vacuum for cleaning up any spills. Additionally, having a pair of gloves and safety goggles is recommended to protect yourself from hot water and potential debris.
Safety is paramount when dealing with a water heater. Ensure that you turn off the power supply to the heater. For electric water heaters, switch off the circuit breaker, and for gas water heaters, turn the gas valve to the “off” position. Also, allow the water to cool for a few hours to avoid scalding. Taking these precautions will help you perform the task safely and efficiently.

Step-by-Step Guide to Draining Your Water Heater
- Turn Off the Water Supply: Locate the cold water supply valve at the top of the water heater and turn it off. This prevents more water from entering the tank during the draining process.
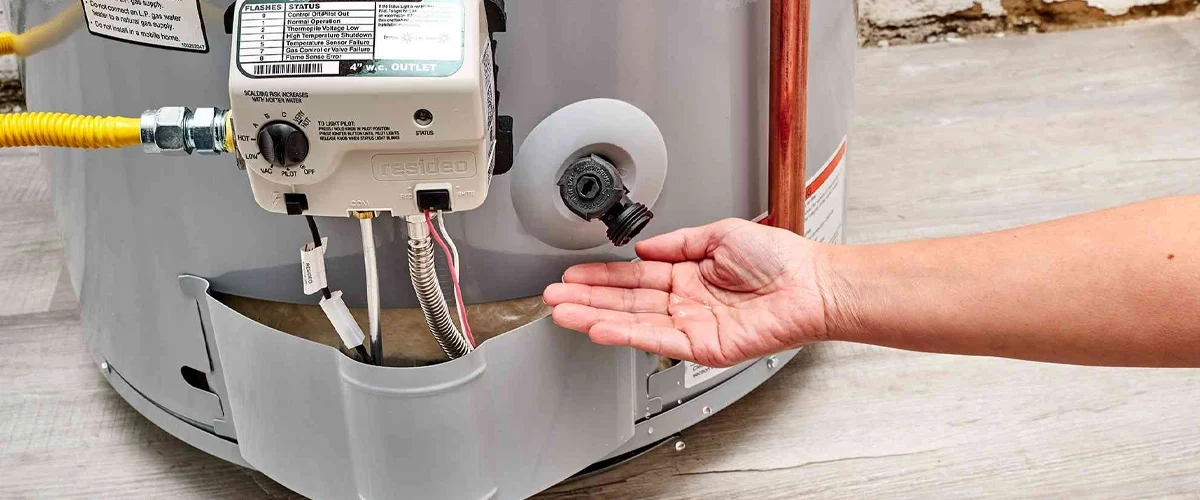
- Attach the Garden Hose: Connect one end of a garden hose to the drain valve at the bottom of the water heater. Place the other end in a suitable drainage area, such as a floor drain or an outdoor location. Ensure that the hose is securely attached to prevent leaks.
- Open the Drain Valve: Using a flathead screwdriver, carefully open the drain valve. Be prepared for the water to start flowing out of the tank. If the water does not flow smoothly, you may need to open the pressure relief valve at the top of the tank to allow air to enter and facilitate the draining process.
- Flush the Tank: Once the water has drained completely, turn the cold water supply back on for a few minutes to flush out any remaining sediment. Allow the water to flow through the tank and out of the hose until it runs clear. This step is crucial for removing any stubborn sediment deposits.
Flushing Your Water Heater: Ensuring a Thorough Clean
After draining the water heater, it’s time to perform a thorough flush to remove any lingering sediment. This step ensures that your water heater operates at peak efficiency and prevents potential damage.
- Refill the Tank Partially: Close the drain valve and disconnect the garden hose. Open the cold water supply valve to refill the tank partially. Let it fill to about one-third of its capacity.
- Stir Up the Sediment: With the tank partially filled, use a long, flexible brush or a wand attachment on a wet/dry vacuum to stir up the sediment at the bottom. This helps dislodge any remaining particles, making it easier to flush them out.
- Drain and Flush Again: Reattach the garden hose to the drain valve and open it to drain the water. Turn the cold water supply on and off intermittently to create a flushing effect, forcing out the sediment. Continue this process until the water runs clear, indicating that the tank is free of sediment.
Reassembling and Restarting Your Water Heater
Once you have thoroughly flushed the water heater, it’s time to reassemble and restart the unit. Following these steps will ensure that your water heater is ready to provide efficient and reliable service.
- Close the Drain Valve: After ensuring that all sediment has been flushed out, close the drain valve securely to prevent leaks.
- Remove the Garden Hose: Detach the garden hose from the drain valve and store it away. Check for any leaks around the valve and ensure it is tightly closed.
- Refill the Tank: Open the cold water supply valve to refill the tank completely. Once the tank is full, open a hot water faucet in your home to release any trapped air in the system.
- Restore Power or Gas Supply: For electric water heaters, switch the circuit breaker back on. For gas water heaters, turn the gas valve to the “on” position and relight the pilot if necessary. Follow the manufacturer’s instructions for your specific model.

Conclusion: When to Call the Professionals
Regularly draining and flushing your water heater is a crucial aspect of water heater maintenance that can significantly extend the lifespan of your unit and improve its efficiency. By following the steps outlined in this guide, you can safely perform this task and ensure a steady supply of hot water for your household needs.
However, if you encounter any issues during the process or if your water heater requires more extensive cleaning and flushing, it is advisable to seek professional assistance. Pompa Plumbing, the water heater experts, specialize in water heater maintenance, installation, and replacement in South Florida. Their experienced technicians can handle any water heater issue, ensuring that your unit operates efficiently and reliably. Whether you need routine maintenance or a complete water heater replacement, Pompa Plumbing provides top-notch services tailored to your specific needs. Don’t hesitate to contact us for expert advice and assistance with your water heater, ensuring your home’s comfort and convenience all year round.


